As I have added more recipes for making jams and jellies, I began to realize I was repeating myself. A lot. I already do that as a teacher all day long. It’s not fun.
Be sure to follow us on social media! You can also click on any picture to save this post to Pinterest!
(All links open a new page, so you won’t lose your spot when you look around! Get information on gardening and cultural traditions, recipes, stories, and more!)
My goal with my recipes is to make it such that someone who has never made something like it before will have success. Perhaps that is the teacher in me coming out, but I’m sure you would appreciate that kind of help, too.
For some types of recipes, though, you have a set of tasks that are always the same, it’s only the ingredients that change. Jams and jellies are a perfect example of this. Over time I have found myself putting in the same lengthy information for each of my recipes just in case it is being viewed by someone who has never made them before. I realized it would be better to have less cluttered recipes with a link to the technical instructions for those that needed them. I’m all for less clutter.

If you are that person who is new to this process, keep reading! If you are the person that struggles to get good results, keep reading, too, as I have tips that may help! Please don’t hesitate to comment below if you have questions as this really helps me to know if there is information that I am missing or areas where I haven’t been clear. Be sure to check out my post on general canning inforamation, as I discuss the various types of equipment you will need and find useful, along with resources to get you going into all types of canning recipes. This link here will get you to all of my recipes for jams and jellies!
Prepping your materials:
->Don’t try to prep while your jelly is cooking or you may find yourself with either burned food or contaminated food. Neither is good.
->Prepare more jars and lids than you think you’ll need, just in case. Usually a batch of fruit and sugar mixture will cook down to 2/3 to 1/2 of the starting amount, though that can vary. I determine how many jars will equal that cooked down amount, then add on a jar or two extra. There’s no problem with extra jars, but there is with not enough.
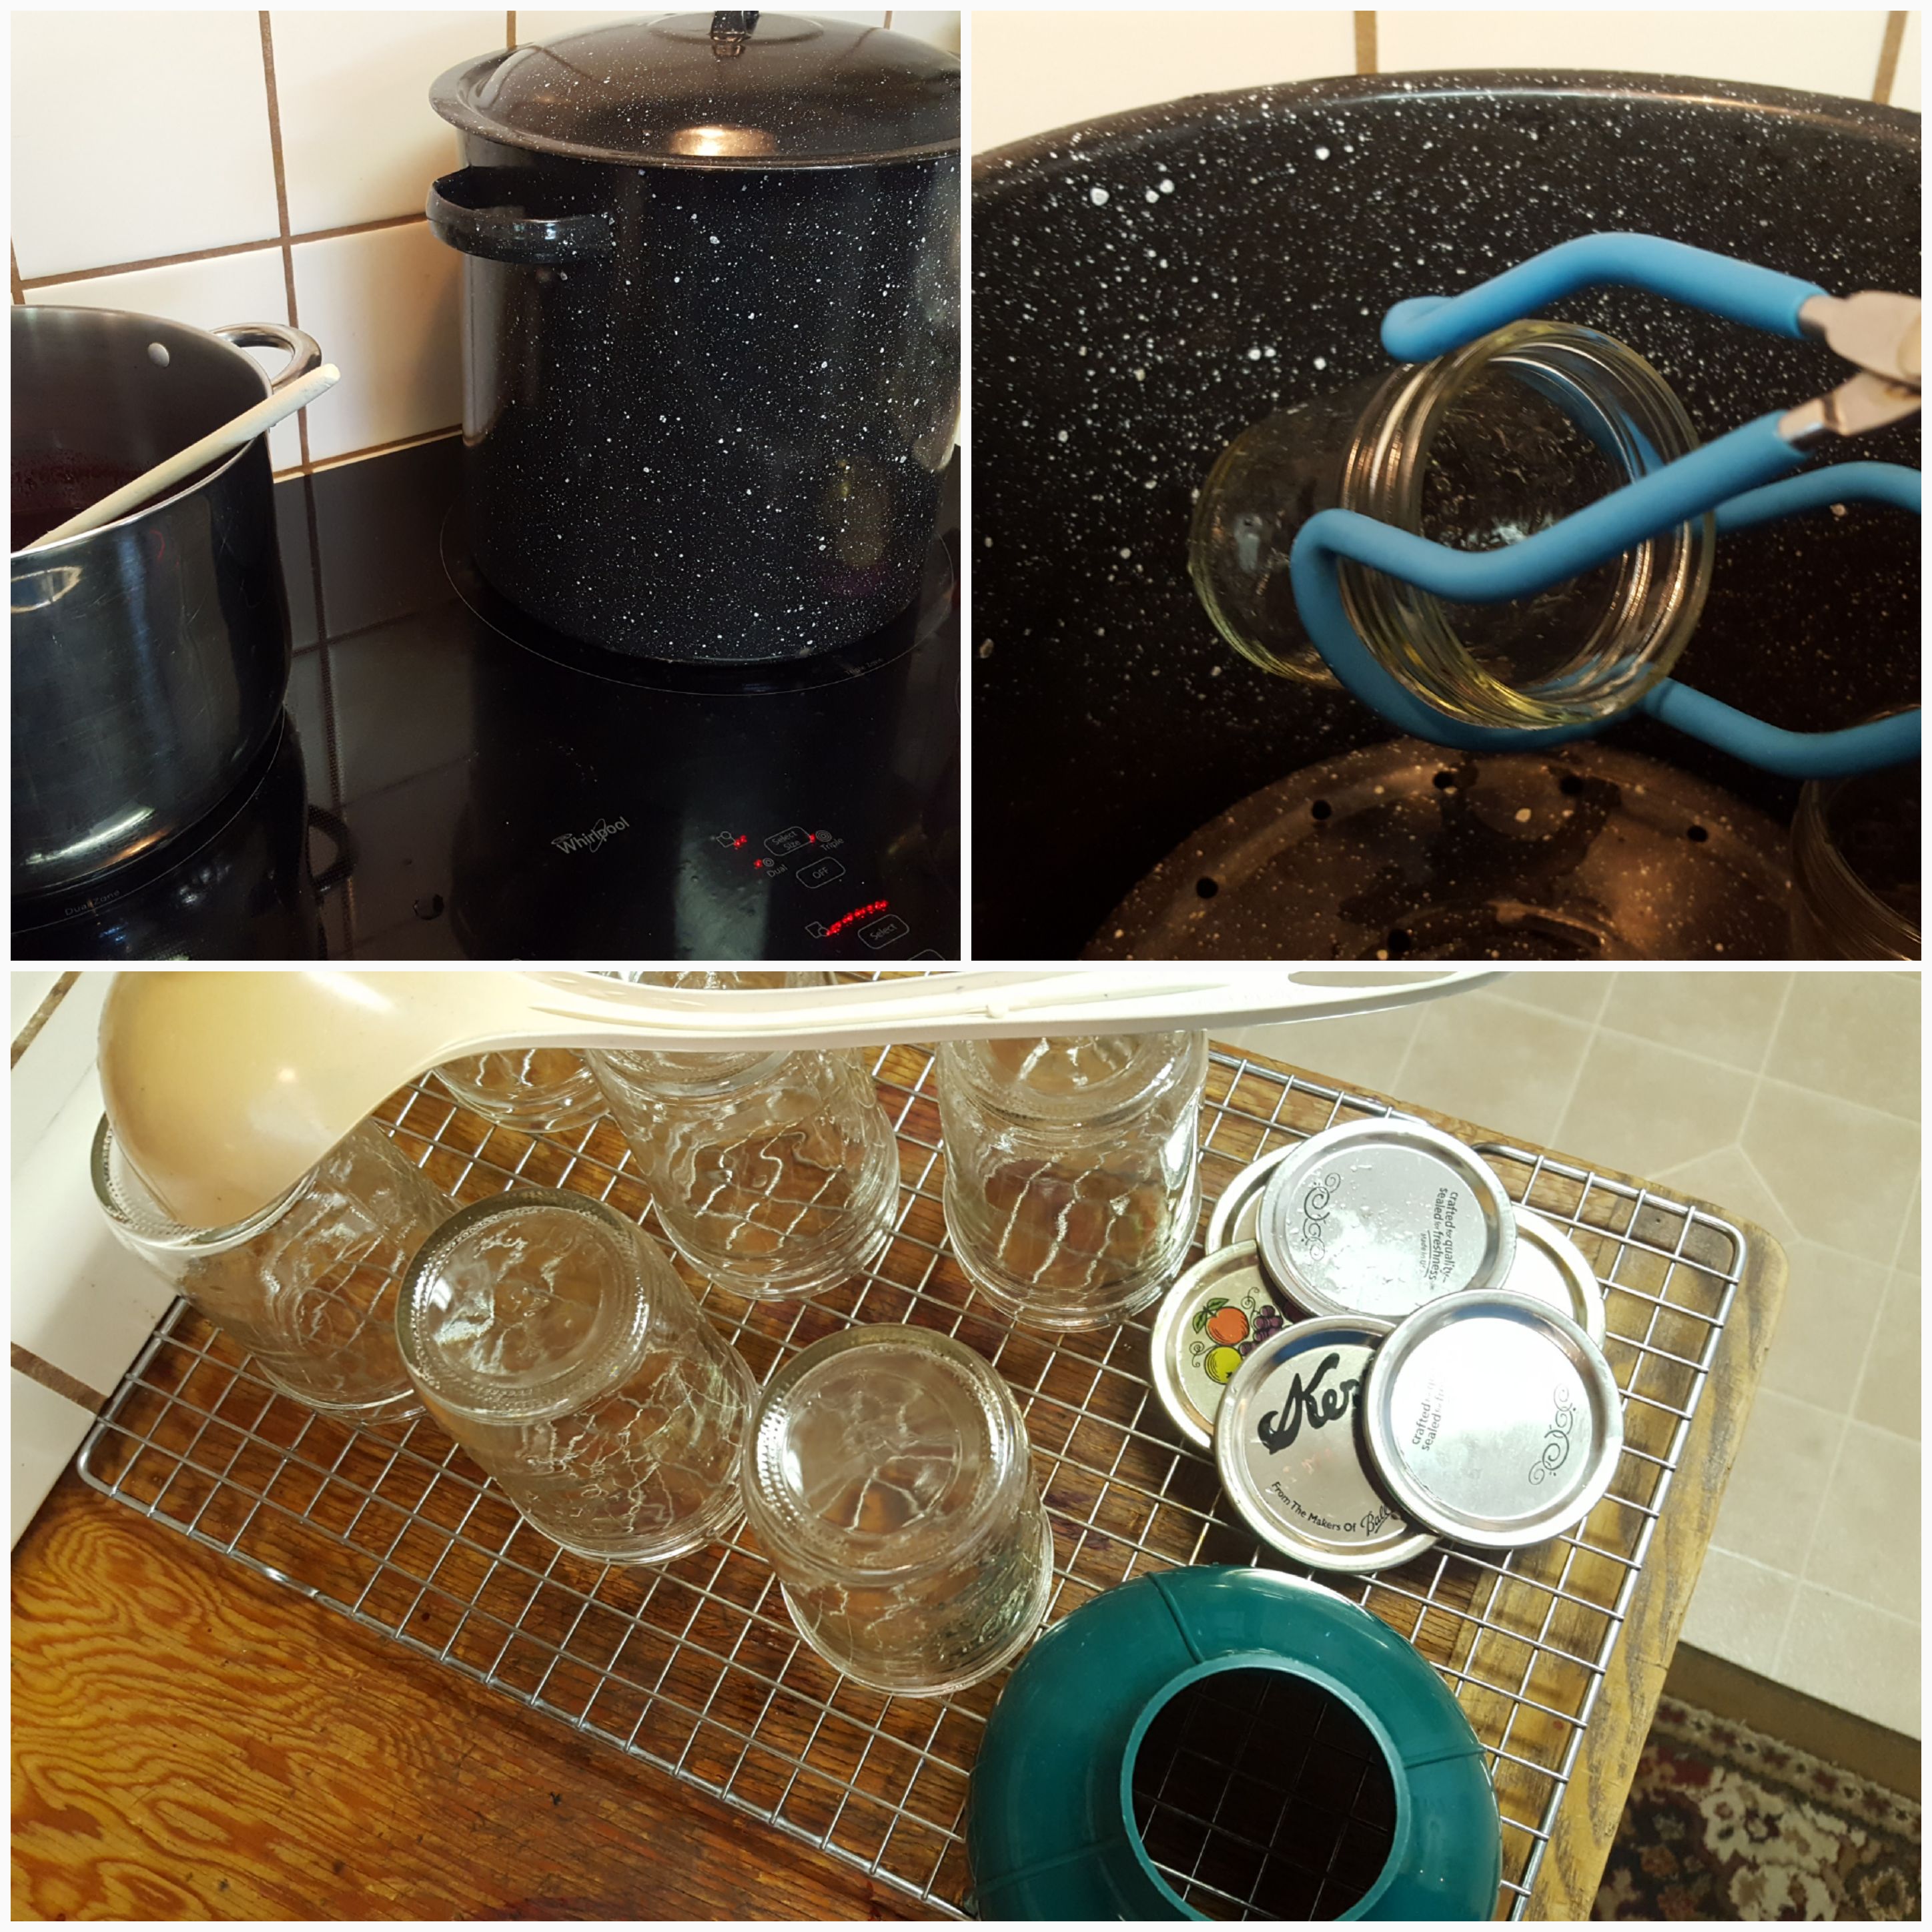
->Prepare your clean jars by removing the lids and placing them into a large pot suited for water bath canning and cover them with water. Bring the water to a boil. Then reduce heat to low while still covered to keep jars hot until you are ready to fill them.
->Put your flat lids into a small pot of water, cover, bring to boil for just a minute, then turn off the heat. Keep the lids in the hot water until you are ready to use them. I confess that I do reuse lids, which is not approved by the FDA. You do what you’re comfortable with, but remember that cleanliness is always key. P.S. No amount of rude comments on this will change my practices and I will simply delete them.
->The best size for jars is half-pint, though pint jars may be better suited for chunkier marmalades. I like to include a 1/2 cup jar just in case there is a little extra that won’t fit into the other jars. And there’s always a little extra. This is optional, though.
->Have a wide mouth funnel, cooling rack, ladle, and jar rings clean and all ready to go. You shouldn’t process more than 4 cups of your fruit juice/pulp (measured before adding lemon juice and sugar) at a time unless you have a larger than usual sized stock pot. It adds too much time to the processing which can cause your pectin to break down, and you can also have the jelly foam up too much where it can overflow the pot.
->Use a pot with tall sides for making the jam or jelly. This will help prevent overflow if your mixture bubbles up, and it will. Be sure that the sides of the pot will allow for a thermometer to be attached as you do not want to be using your hands to hold the thermometer. This is dangerous as the mixture will get very hot and splatter.
->A flat wooden paddle-type spatula with a long handle is preferred over a spoon for stirring when needed (see below), as well as a long wooden spoon for breaking up any bubbles that may overflow the pot (see below).
->Have a clean paper or lint-free cloth towel and distilled vinegar ready. You will use a little vinegar on the towel to wipe the rims of your jars after filling them to ensure that they are clean without contaminating them. Water will not disenfect and dirty rims will prevent a proper seal.
Types of jams & jellies:
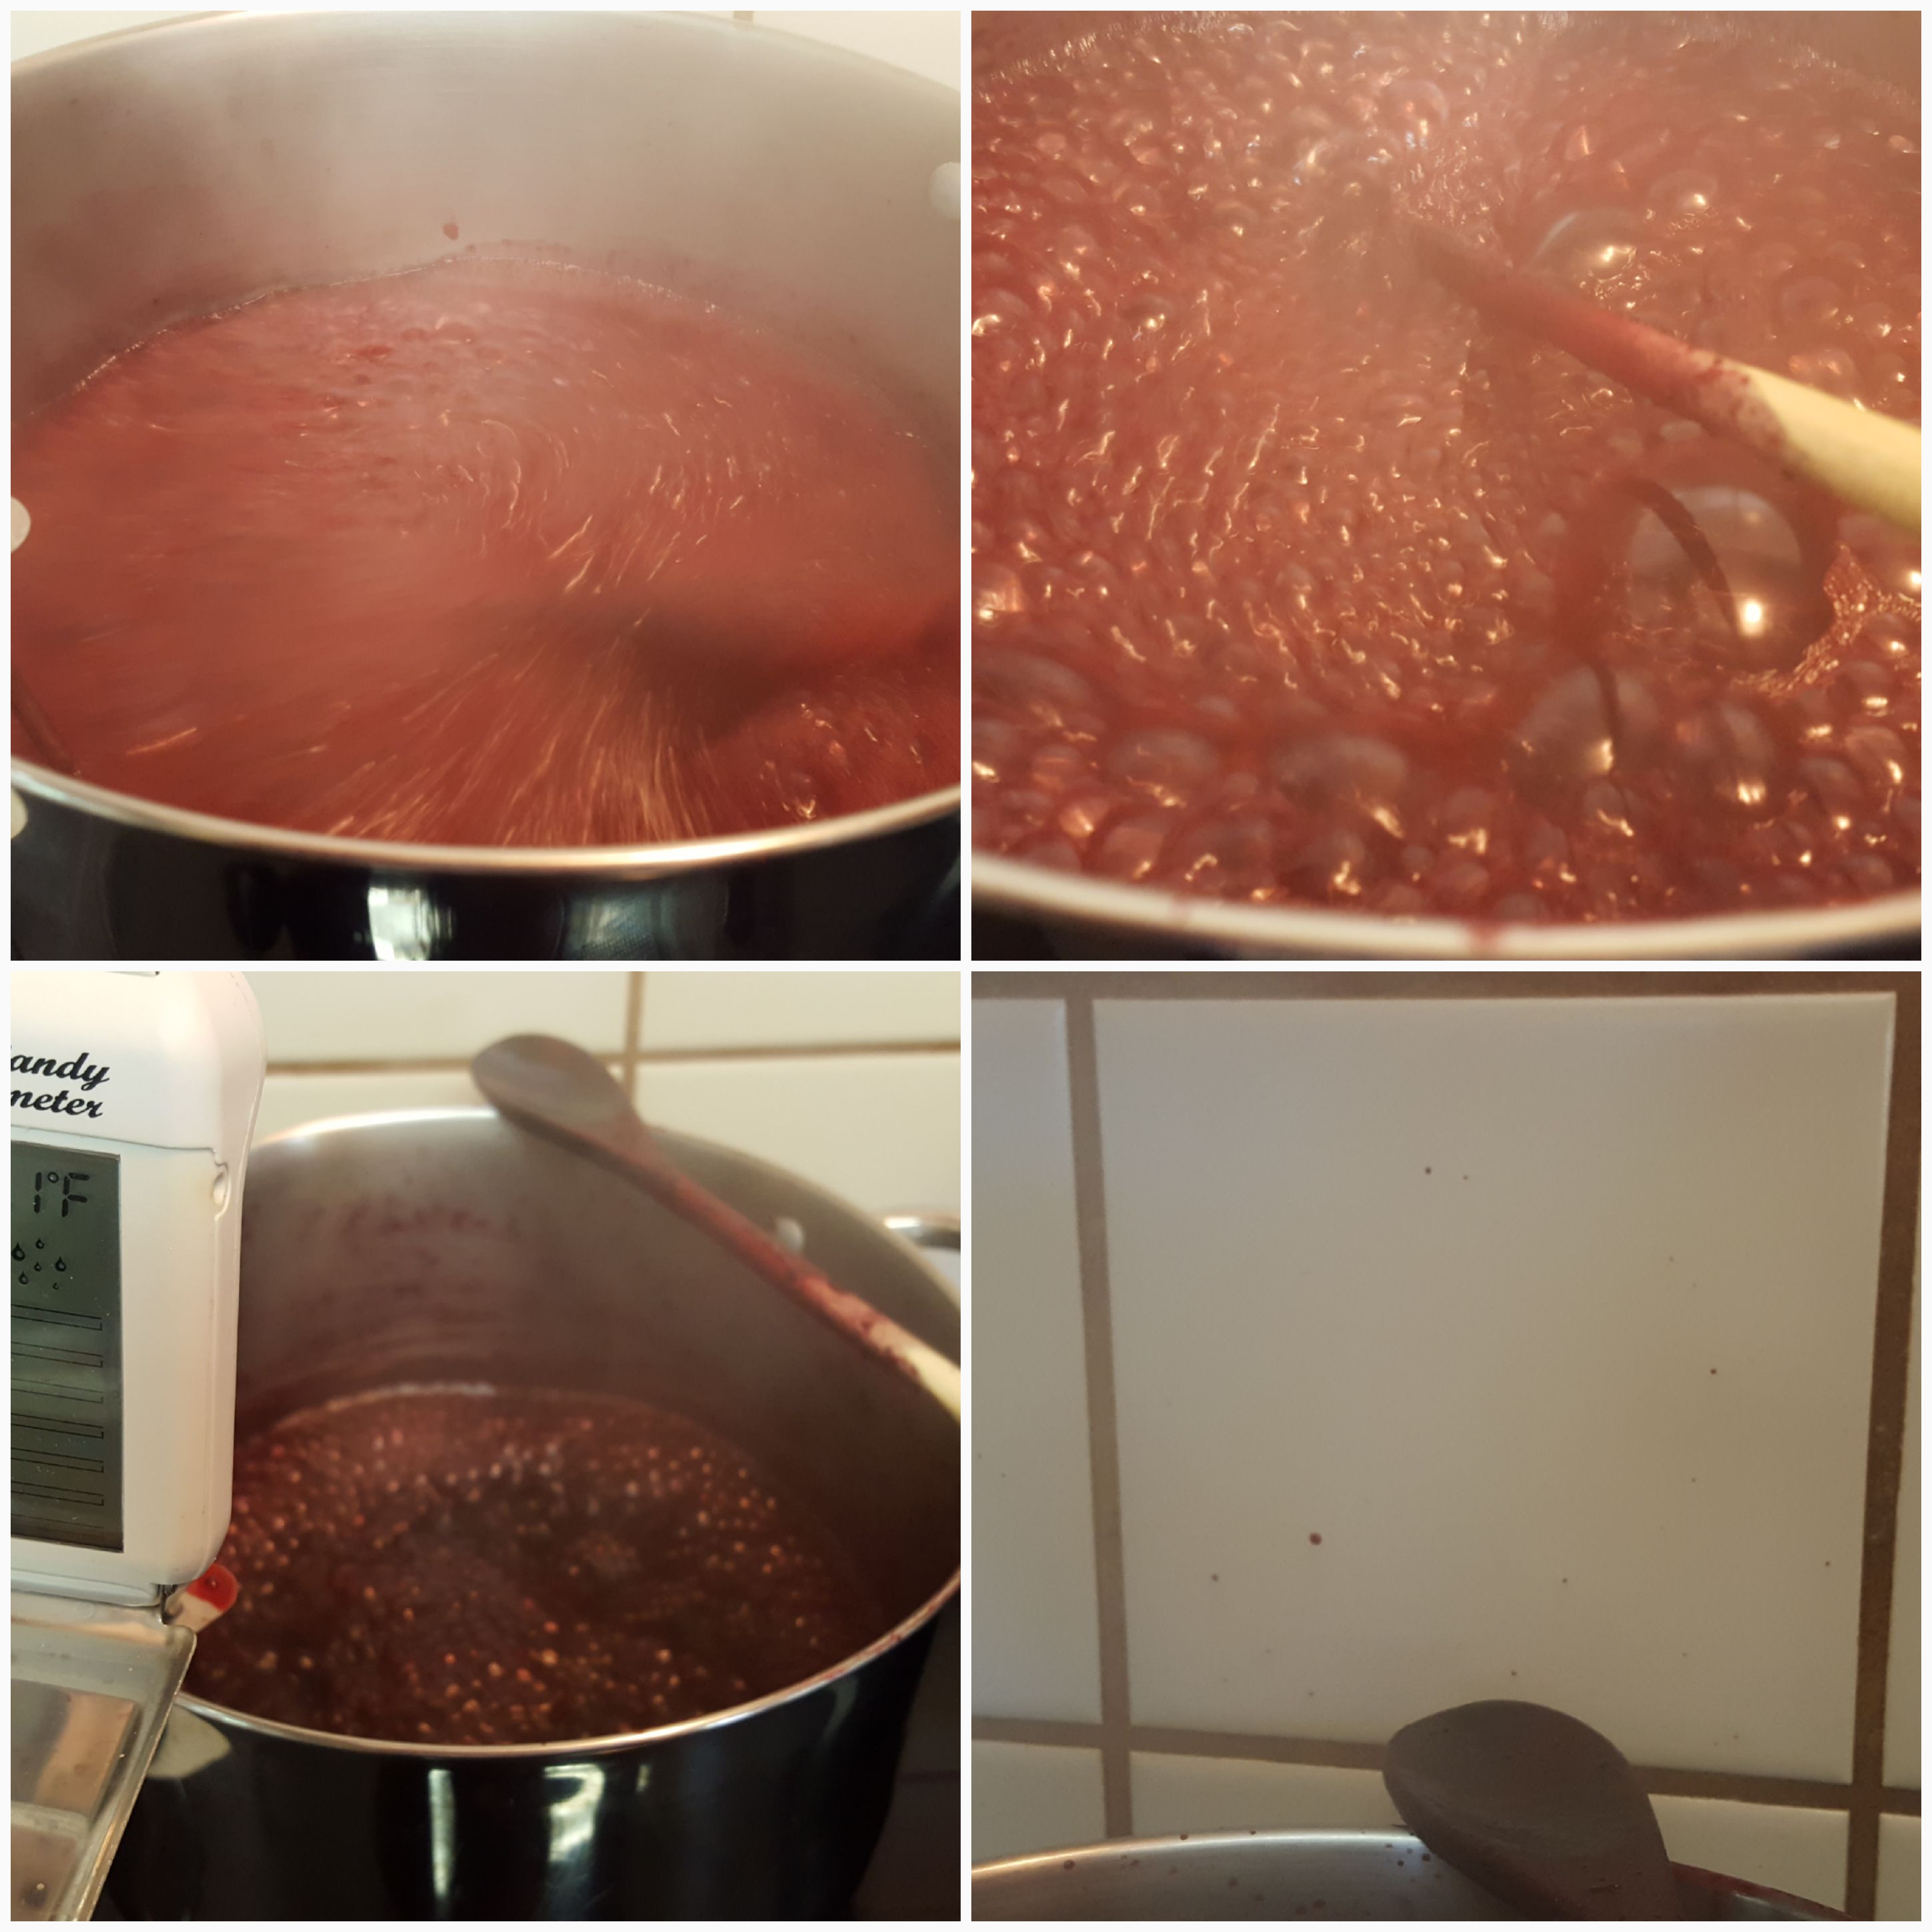
->There are two methods for making jams and jellies. One method relies on using the fruit’s natural pectin or adding commercial pectin to form a gel with the sugar and liquid. For this to work, you have to get the mixture to a set temperature, which is 10 degrees F above the boiling point of water at your elevation. For me that’s 222 F since I’m near sea level where water boils at 212 F. I have seen so many runny preserves posted on the internet simply because people didn’t reach that gel point. Though there are some old fashioned techniques to test if your mixture is ready, they are no substitute for a good digital thermometer. Let’s face it, this process takes work, why risk wasting your time on getting less-than-perfect results?
->The cook-down method can be used for those fruits that don’t have adequate amounts of pectin to set on their own. This process relies on reaching a desired thickness, not temperature. However this is only for jams that have fruit solids, not for jellies which are just the juice. To have a jelly set with juice from a low pectin fruit, you will need to have a source of pectin. Fun fact, you can use scraps from apples to be a free source of pectin! See my post on how to do this here!
Tips for success:
->Do NOT skip the lemon juice or try to reduce the sugar. The lemon juice lowers the pH of the mixture to prevent spoilage, and the sugar helps in gelling along with creating a low moisture environment that also helps with preventing spoilage. My recipes are already at a lower level of sugar than many others, so I don’t advise reducing it any further.
->If you are making jelly (no fruit solids, only liquid), it is important that you do NOT stir the liquid once the sugar is dissolved. Stirring reduces the temperature and lengthens the time to get to the gel point. This can lead to a breakdown of the pectin and it won’t gel.
->If you are making jam (fruit solids with liquid) that are being set with pectin, stir only occasionally to prevent the solids from settling and scorching on the bottom. The best tool is a paddle-type of spatula, preferably wooden, to push things off the bottom rather than a spoon.
->If you are making a fruit “butter” or cooked-down jam (fruit solids, either pureed or in chunks, and no reliance on pectin), stirring is very helpful for preventing burned solids and speeding up the evaporation of the water to cook it down. No thermometer needed.
->If your mixture begins to boil up to the point it may overflow the sides of the pot, remove the pot immediately off the heat and rapidly wave a wooden spoon through the bubbles on the top to break them. You may need to turn your heat down just a little and continue to use the spoon to pop bubbles before they get too high. This is why working with proper sized pots and amounts of mixture is important!
->I have noticed that the temperature rises in a certain pattern. It will rapidly increase to the boiling point and then it will slow down and stubbornly refuse to change much around 215 F. It will creep up to 217-218 F and the again slow down. Then it will rapidly approach 220 F and then slow down again. Then before I know it, it’s hitting the magic spot between 221-222 F which is where I will remove it from the heat right away. Part of this may be due to the fact that I have an electric stove-top that does not maintain consistent heat, but I experienced mostly the same pattern when I had a gas stove, too.
Filling and processing jars:
->I start removing the jars and lids from the water bath once the temperature of the jam/jelly is at 117 F. This is where the jar lifter mentioned in my Canning 101 post becomes essential. The jars and lids are put upside down on the cooling rack to drain. Have a space next to the cooling rack where you will be able to set your pot of jelly next to it so you are working efficiently.

->Once the jelly/jam is ready, flip one jar right-side-up, put in your wide-mouth funnel, and fill carefully using a ladle. The jar should be filled up to 1/4 inch from the top.
->Flip another jar over, pull the funnel straight up out of the jar you just filled, and set it into the empty jar. The goal is to not get material all over the rim of the jar.

->Wipe the rim with a little vinegar on a clean towel, put a flat lid and ring on and tighten. Don’t tighten too hard, just enough to be secure. Flip the filled jar upside-down and set it aside. This allows the hot mixture to heat the lid further.
->Repeat this process of filling one jar at a time as quickly as possible until all the mixture has been removed from the pot.
->Carefully flip each jar back over. At this point, the FDA advises that the jars should then be processed in a boiling water bath for 10 minutes. This means putting the jars back into your canning pot of hot water, then bring to a boil, and boil for 10 minutes (you start timing once a boil has been reached, not once you put it into the canner). This ensures that any microbes that may have made their way in won’t have a chance to survive.
->After the jars have been removed from the water bath and have completely cooled, remove the rings and check gently to make sure that the lid has sealed. Wipe off anything that may have oozed out of the jar and ensure the metal rings are clean and dry.
->Any jars that didn’t seal should be put into the fridge for storage and use. I also use partially filled jars first.
Storage and safety:
->It IS okay to leave rings on the jars (yes, this is an approved practice). There is a myth that this could lead to “false seals” not being detected, but that has been disproven. However, if you live in an area with high humidity, you may want to keep the rings off to prevent them from rusting to the jar.
->Jars should not be stacked in order to prevent accidental breaking of seals. However, if a thick piece of cardboard is placed over a layer of jars to distribute weight and protect from bumping, then another level of jars can be put on top.
->Any jar that becomes unsealed should be treated as possibly contaminated. If there is visible mold or off smell, discard it. If there isn’t, that doesn’t mean it’s safe to eat because some contaminants don’t create detectable spoilage. Though botulism is rare in jams and jellies, it is possible.
I realize that this is a LOT of information to go through, but this is the result of nearly three decades of preparing and canning jams and jellies. I’ve had some failures here and there, but now it’s something I can do quickly and successfully each time. The rewards are having shelves filled with tasty, homemade treats that can be enjoyed long after the fresh fruits are gone. Please feel free to comment any questions, and happy canning!